
-
Peel and slice the bananas into ¼-inch thick rounds.
-
To prevent browning, you can lightly toss them in a little lemon juice, but be careful not to overdo it or the flavor will alter.
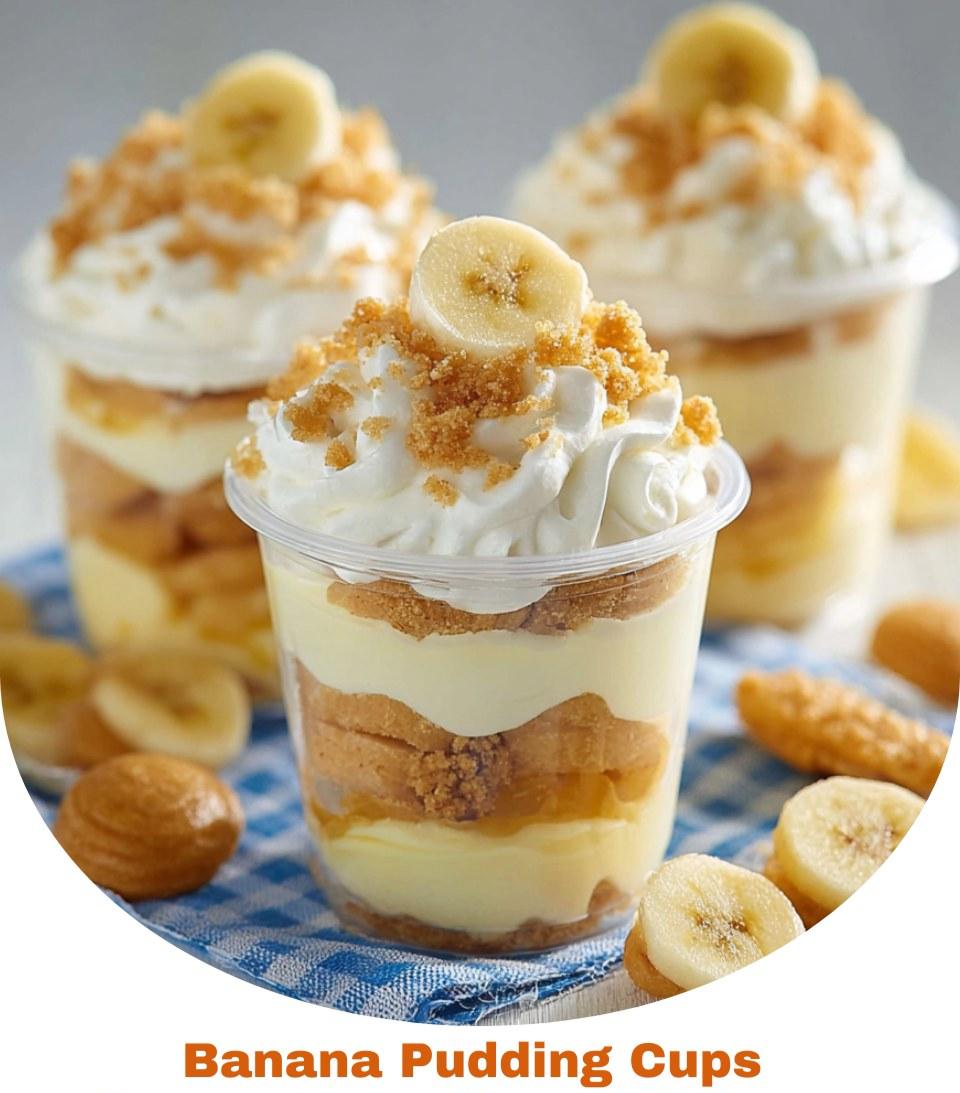
Step 4: Layer the Banana Pudding Cups
You can use clear plastic cups, mason jars, or small trifle bowls.
-
Bottom Layer: Place a few vanilla wafers at the bottom of each cup. You can leave them whole or lightly crush them.
-
Banana Layer: Add a layer of banana slices on top of the wafers.
-
Creamy Layer: Spoon or pipe in a layer of the cream cheese mixture.
-
Pudding Layer: Add a layer of vanilla pudding.
-
Repeat the layers until the cup is filled, finishing with whipped topping or pudding on top.
Step 5: Garnish and Chill
-
Top with extra whipped cream, crushed wafers, banana slices, or a drizzle of caramel.
-
Refrigerate for at least 2–3 hours (or overnight for best results) before serving.
Tips for Success
-
Use ripe bananas – They should be sweet and spotty but not mushy. Overripe bananas can make the dessert too soft.
-
Chill for best flavor – Letting the cups rest in the fridge allows the wafers to soften and flavors to meld.
-
Layer neatly – Using a piping bag or ziplock bag for the creamy mixture makes layering cleaner.
-
Prevent browning – Assemble cups close to serving time, or coat bananas lightly with lemon juice.
-
Make it ahead – Banana pudding cups are best eaten within 1–2 days, but you can prepare them the night before an event.
